A shoot is where your products, your models and a location come together to make pictures. This guide shows you how to start a shoot, and how to set up each shot in it: who is in it, what they wear or hold, where they stand, pets, props, the look and the size.
Before you start
You need three things before you can start a shoot:
- At least one product, selected - see Your products.
- At least one model, chosen - see Models.
- A location, chosen - see Locations.
Until all three are in place, New shoot takes you to the page for the step that's missing instead. Elsewhere in the studio, the shoot button says what's missing - for example Select products to start a shoot or Choose models to start a shoot - and takes you to the page where you can fix it. Once everything is ready, it reads Start a shoot.
You also need some credit before you can make a picture (starting a shoot itself is free). See Credit and billing.
Start a shoot
Click Shoots in the menu, then New shoot at the top right. (Your Studio page has a New shoot button too, and your Library has Start a shoot.)
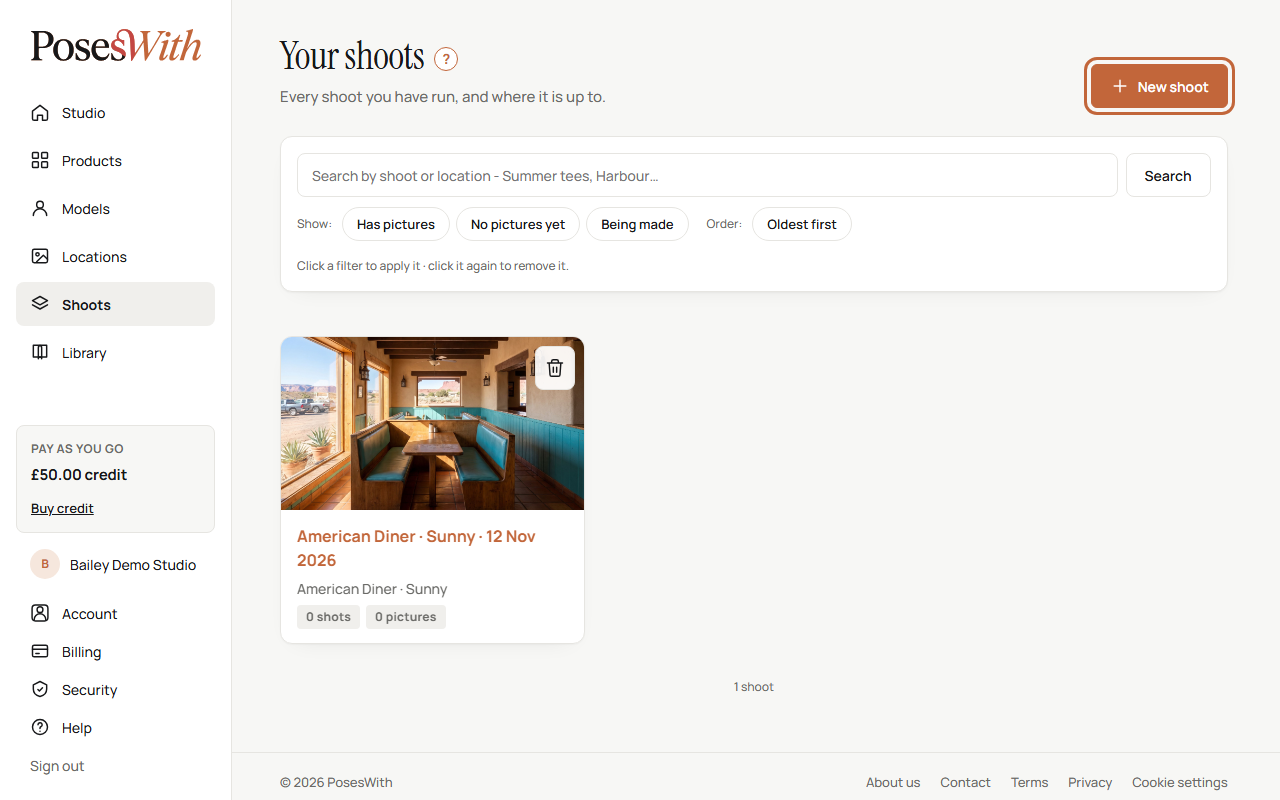
The Start a shoot page shows everything you've chosen, in three boxes:
- 1 · Location - the place every picture in this shoot is set. Click the eye on the picture to see the whole location. Change location takes you to the Locations page to pick another.
- 2 · Models - the people and pets you've chosen. Click the eye on a model to see their pictures. Remove takes a model out. Change models takes you to the Models page to add more.
- 3 · Products - the products you've selected. Remove takes one out. Change products takes you to the Products page.
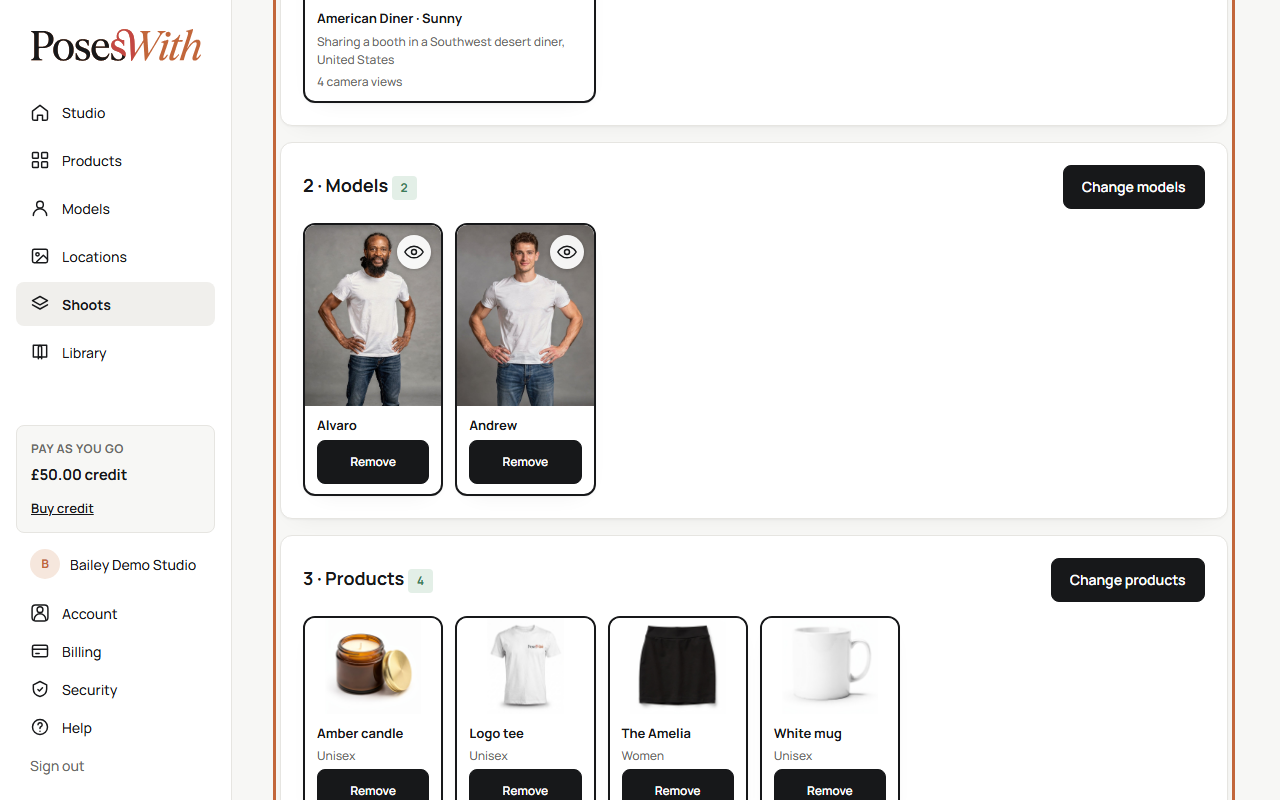
Check the bar at the bottom. It shows the location, how many models and how many products will go into the shoot. If something is missing, it says what - for example Choose a location to shoot in.
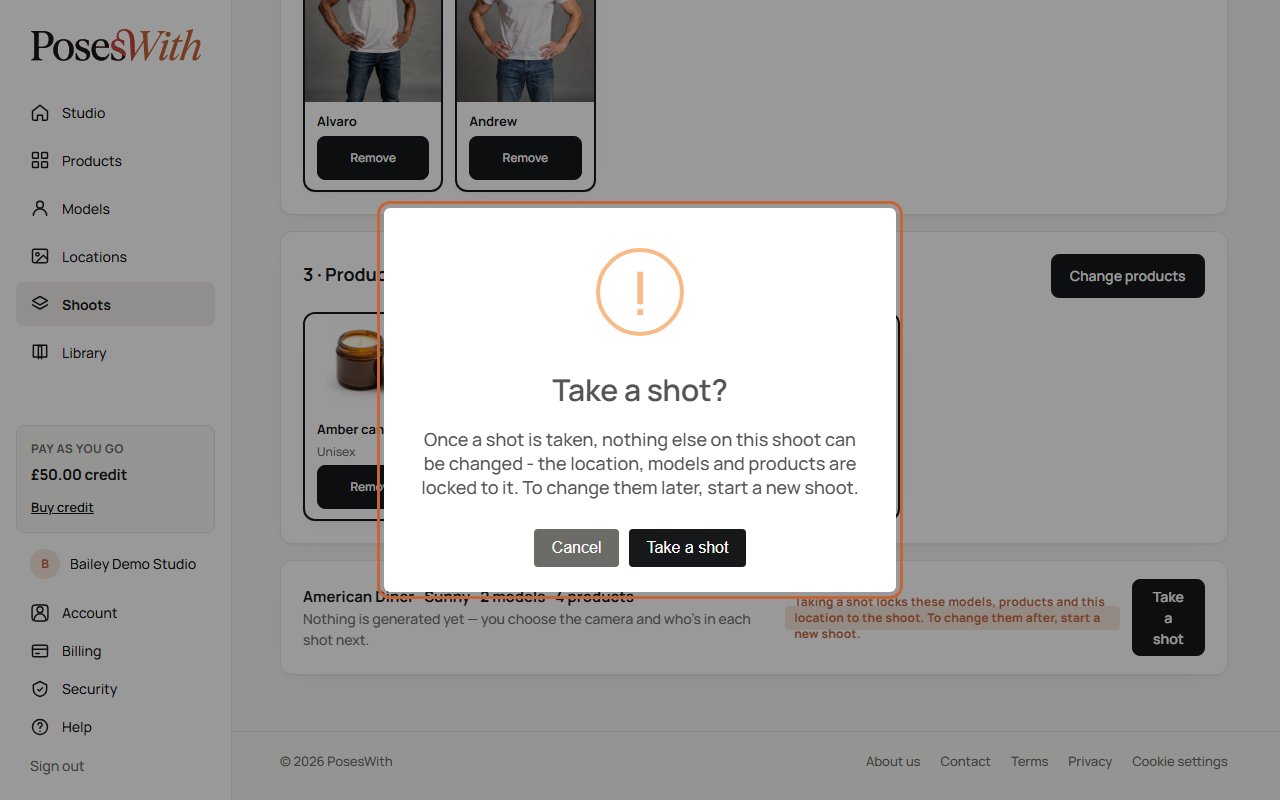
Click Take a shot. A box asks you to confirm, because the shoot is about to be locked (see below). Click Take a shot again to carry on, or Cancel to go back.
Your shoot opens straight away. Nothing has been made and no credit has been used yet - next you set up your first shot.
The new shoot is named after its location and today's date, for example "Harbour · 12 Nov 2026". Your picks on the Products and Models pages are cleared, ready for your next shoot.
Watch out: Once you click Take a shot, the location, models and products are locked to that shoot. To use different ones, start a new shoot.
Tip: A shoot can hold up to 30 products. If you've selected more, the page says The first 30 go into this shoot - the rest stay selected for your next one.
How many models and pets
There are two different limits, and it helps to know which is which.
In a shoot: up to 15 people and up to 5 pets. These are the models you choose on the Models page before you start. If you try to choose more, a message tells you That's the most people (or pets).
In one shot: up to 5 models and up to 5 pets, and no more than 7 together - or pets on their own. So a shoot with 15 people can still make pictures of all of them: take them in front of the camera a few at a time, one shot after another.
Some locations take fewer people. The shoot page tells you how many the location takes - see Who is in the shot.
Your shoots
Click Shoots in the menu to see every shoot you've started, newest first. Each card shows the location, how many shots it has and how many pictures. Click a card to open that shoot.
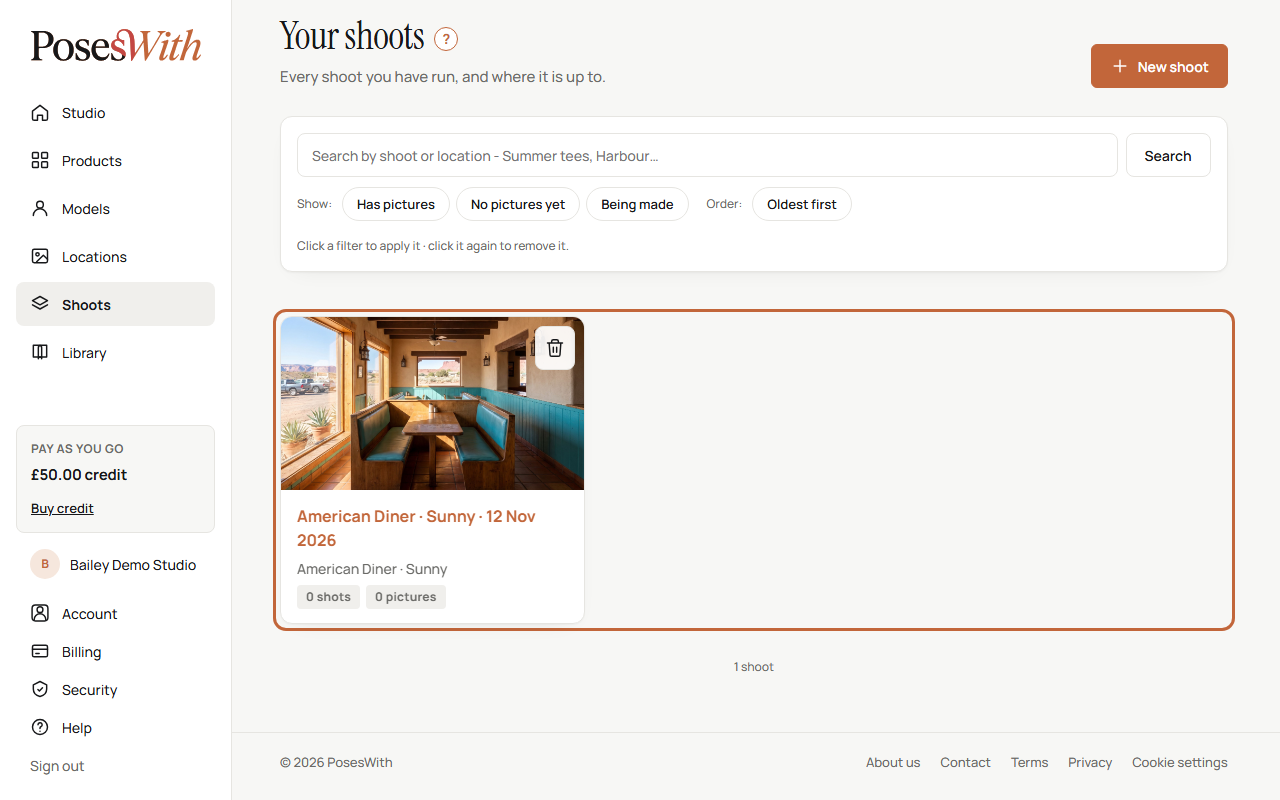
To find a shoot:
- Type part of its name or its location in the search box and click Search. Clear shows them all again.
- Under Show:, click Has pictures, No pictures yet or Being made. Click the same one again to turn it off.
- Click Oldest first to turn the order round.
If you have lots of shoots, they're split into pages - use the page numbers at the bottom.
If nothing matches, you'll see No shoots match. Try another search, or click show them all.
Delete a shoot
On the Your shoots page, click the bin at the top right of the shoot's card.
If the shoot has pictures, a box warns you that they will be deleted too. Click Delete to go ahead, or Cancel.
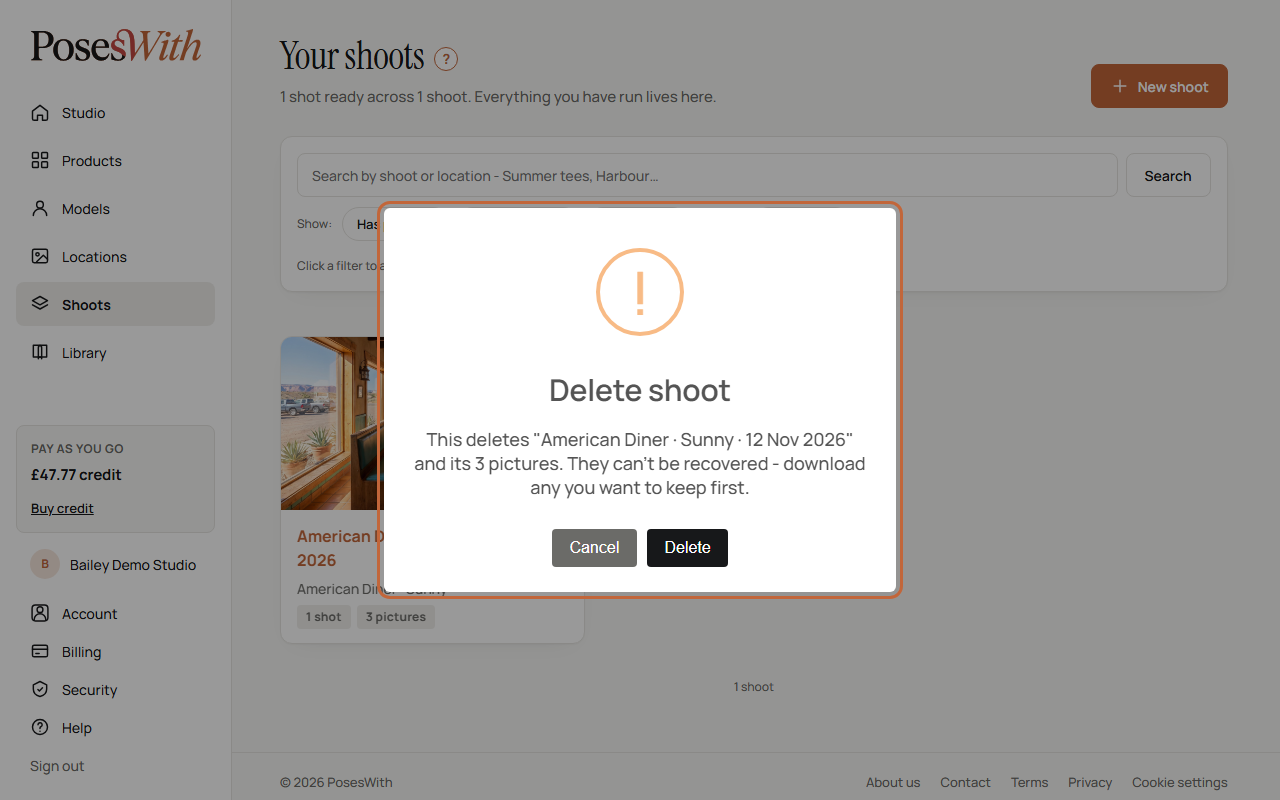
A shoot with no pictures is deleted straight away, with no warning.
Watch out: Deleted pictures can't be recovered. Download any you want to keep first - see Pictures.
You can't delete a shoot while a picture is still being made. Wait for it to finish, then try again.
The shoot page
This is where you set up each shot and see the pictures come back. From top to bottom:
- Shots and Videos buttons under the title - click one to jump down to your pictures or your video clips. All shoots at the top right takes you back to the list.
- 1 · Included in this shoot - the shoot's products.
- 2 · Who is in the shot - the models, what they wear and where they stand.
- 3 · How it is taken - the look of the picture.
- Choose your size - the shape of the picture.
- The bar with the Generate button.
- Shots - your pictures, newest first. See Pictures.
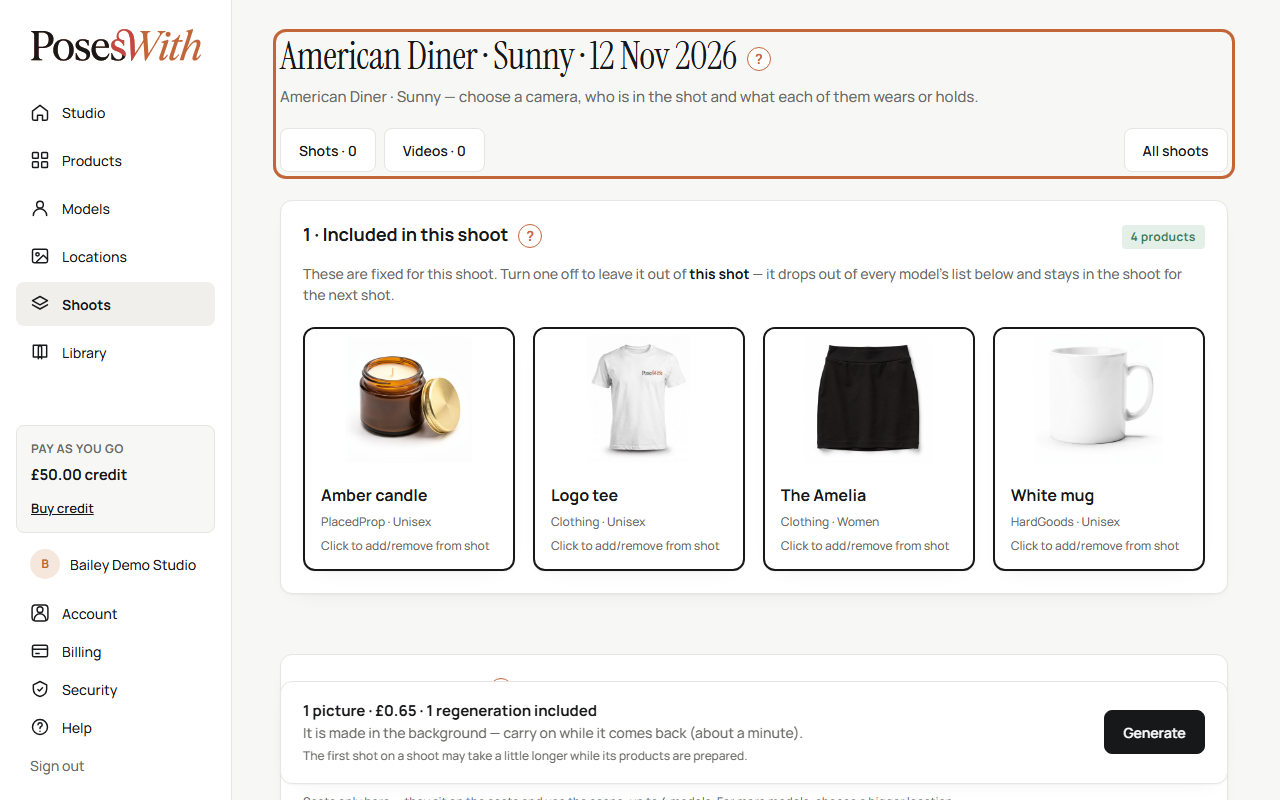
Each new shot starts with the same choices as your last one, because the next shot is usually a small change. Change only what you want to be different.
Products in this shot
The box 1 · Included in this shoot shows the shoot's products. These are fixed for the shoot, but you don't have to use them all in every shot.
- Click a product's tile to leave it out of this shot. It drops out of every model's list further down.
- Click it again to bring it back.
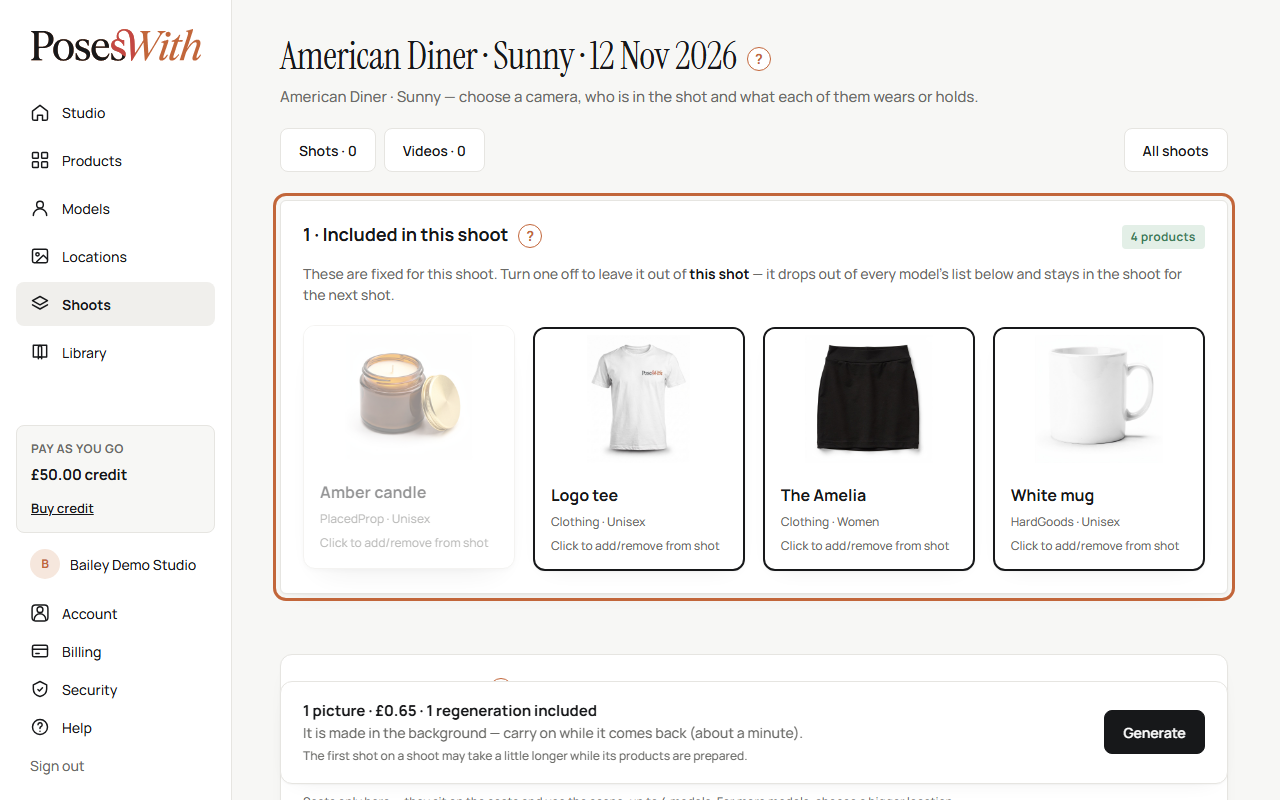
A product you leave out stays in the shoot for your next shot.
Who is in the shot
In the box 2 · Who is in the shot, you choose who goes in front of the camera this time.
Tick each model you want in the shot. Their tile opens up to show their choices.
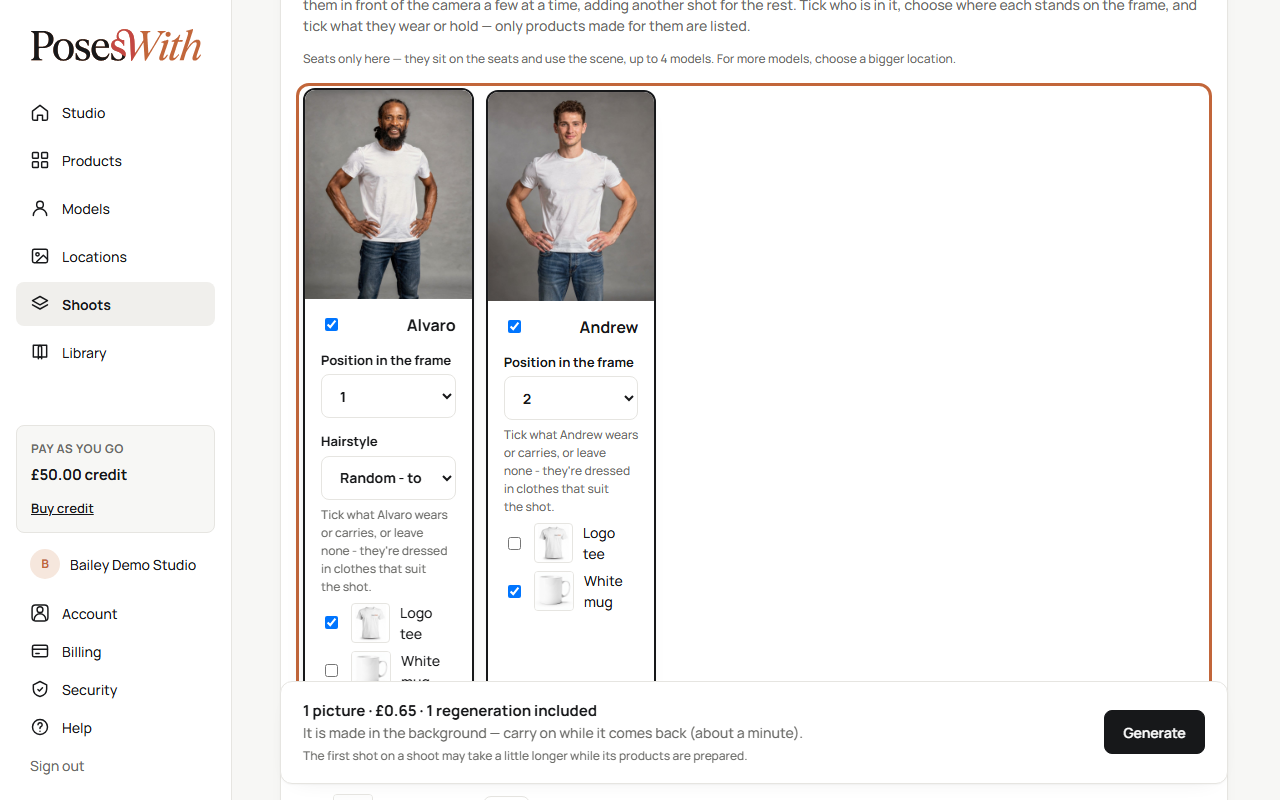
Under each one, choose their Position in the frame. The picture of the location below the models shows numbered circles - each number is a place in the picture, left to right as the camera sees it. The names appear in the circles as you place people.
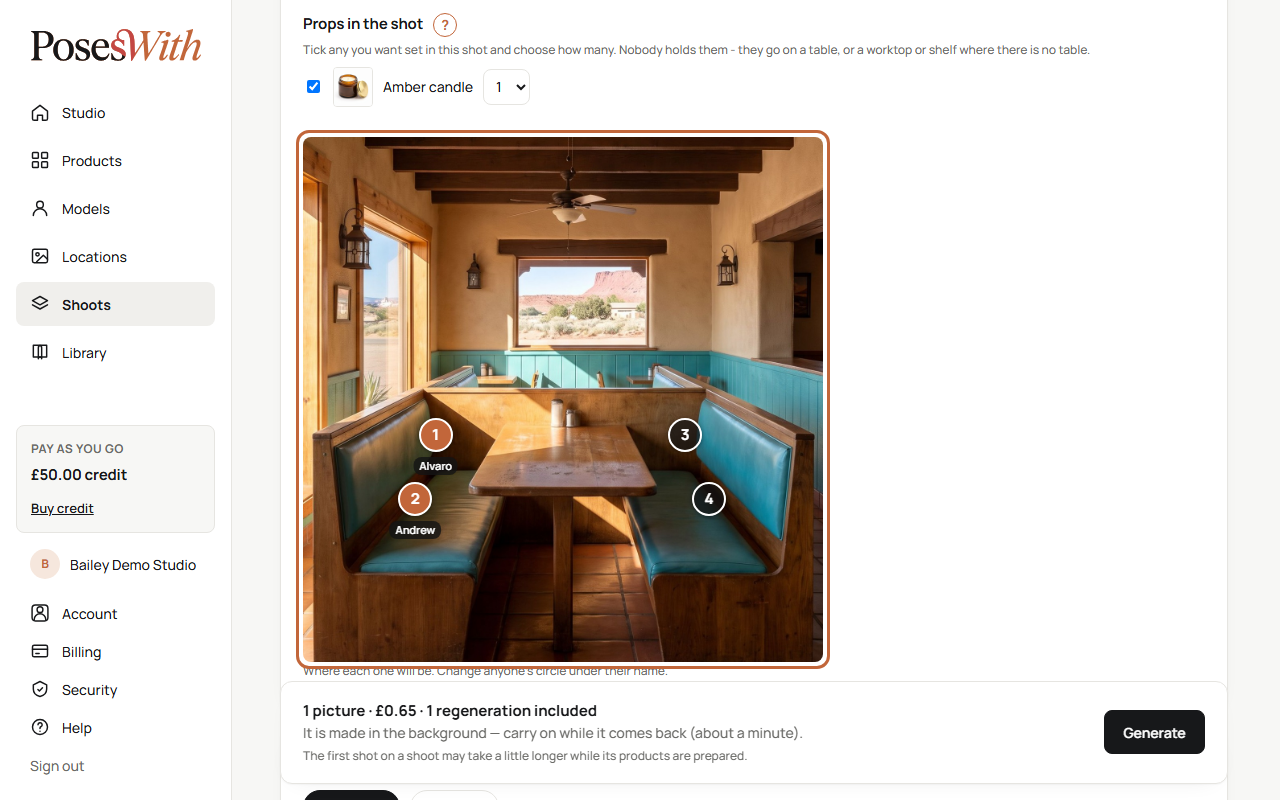
Some locations offer a choice of how the group is arranged:
- Standing as a group - they stand together.
- Interact with the scene - they sit on the seats and use the furniture.
The note under the choice tells you how many models the location takes each way. Some locations are Seats only or Standing only, and then there's no choice to make. If you want more people than the location takes, choose a bigger location for a new shoot.
Tip: Two people can't share a circle. If you put two in the same one, you'll be asked to give each their own.
Hairstyles
For a model whose hair is long enough to wear up, you'll see a Hairstyle box under their position.
- Random - to suit the shot - we choose a style that goes with their outfit and the place. This is where it starts.
- None - as on the reference - their hair exactly as in their own pictures.
- Or pick a named style from the list.
The hairstyle used is shown afterwards in Who's in this shot on the picture.
What each model wears or holds
Under each ticked model is a list of the shoot's products made for them. A women's product is offered to women, a men's to men, a unisex one to everyone, and pet products only to pets.
- Tick what the model wears or carries.
- Or tick nothing - they're dressed in clothes that suit the shot.
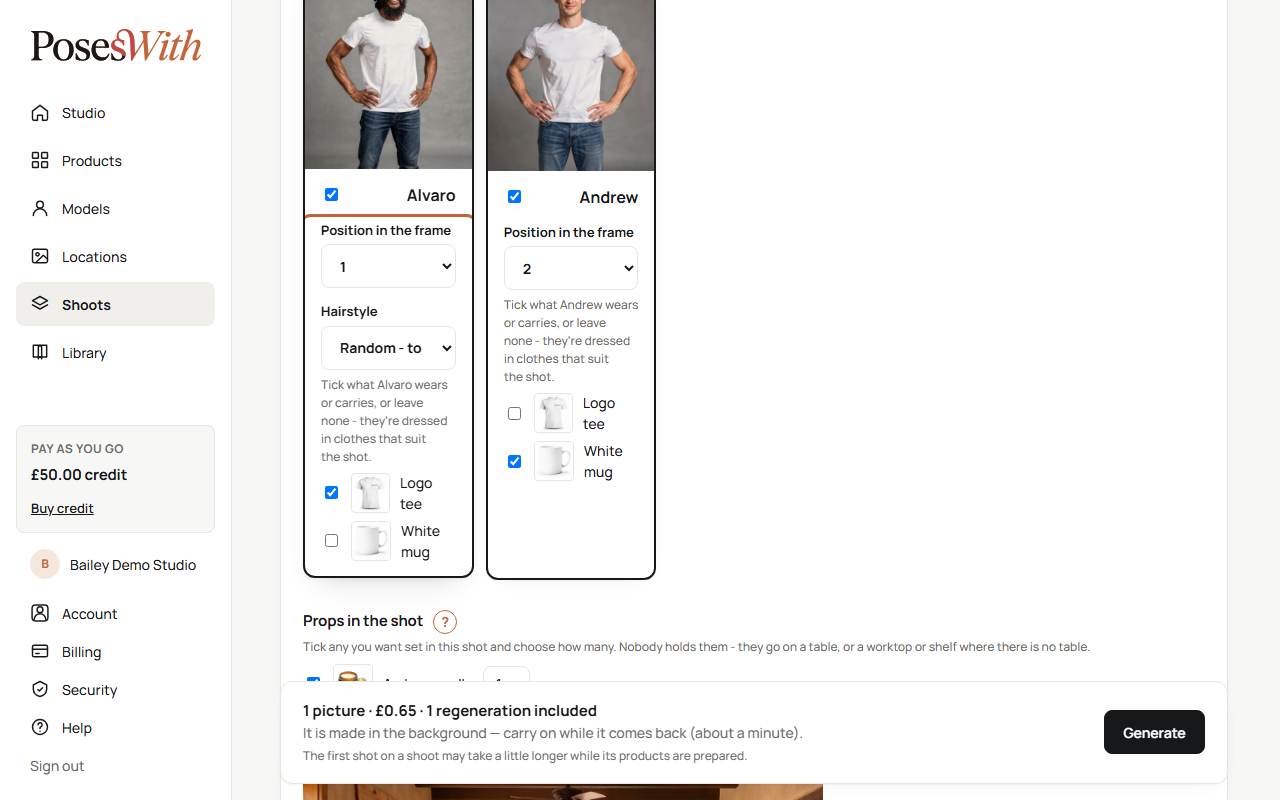
If you see None of this shoot's products are made for them, that model can still be in the shot, wearing clothes chosen to suit it.
One of each: a model can wear one top, one pair of bottoms, one jacket or coat and one pair of shoes from your products. If you tick two of the same kind, you'll be asked to pick one. The rest of the outfit is filled in for you.
Furniture: if one of your products is furniture, such as a sofa or a bench, it shows how many it takes (for example "takes 3"). Tick it for each person who uses it. A picture of it appears with numbered places - choose each person's spot in Place on it. In an empty room made for your own furniture, everyone in the shot has to use it.
Pets in a shot
Pets are ticked just like people. What you can choose for them depends on the location.
Where they go - in Position in the frame:
- R · relaxed near the people - where a pet starts.
- P - a spot for pets only. Outdoors it reads playing or exploring; indoors, settled naturally in the room.
- Walking with or Sitting with one of the people in the shot - on a lead beside them.
- Or a numbered circle, the same as a person.
What they wear - tick a collar, harness, lead or coat from your pet products, or leave none.
Some things aren't allowed, and the shoot tells you if you try:
- A pet that's playing (on P) can't have a lead. A relaxed pet (on R) can't have a lead or a harness.
- At home, a pet settles on the floor with no lead or harness, so those aren't offered.
- Pet furniture is for indoor locations only.
- In some places a pet can't be seen at all - its name says can't be seen from here.
- Not every pet can go in a rain location yet. If yours can't, you'll be told.
Wet look - at a place by water, a dog can have Wet look · fresh out of the water. Tick it to show the dog wet.
Props in the shot
If your shoot has products that are set down rather than held - candles, vases and the like - they're listed under Props in the shot.
- Tick any you want in this shot.
- Choose how many, from 1 to 3.
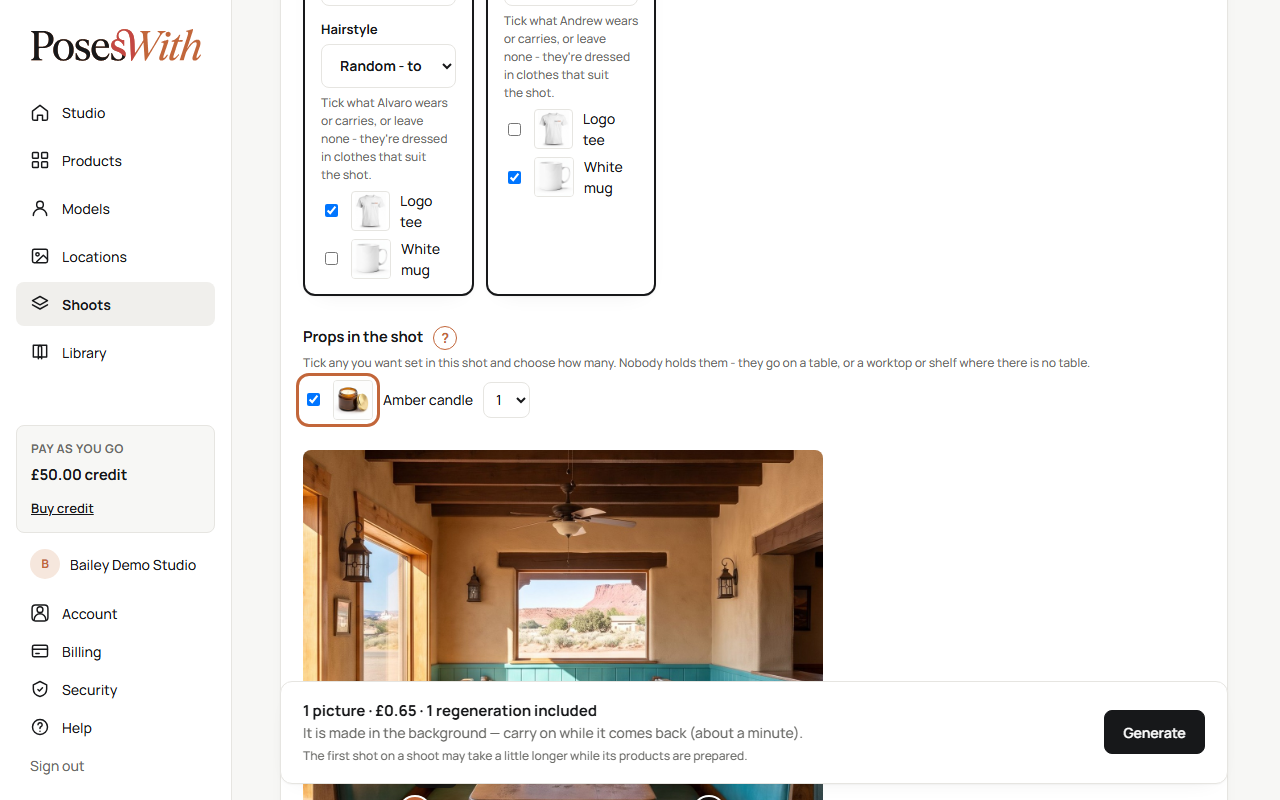
Nobody holds them. They go on a table, or a worktop or shelf where there is no table. They all start unticked.
How it is taken
The box 3 · How it is taken sets the look of the picture. Each line is a pair - click one side.
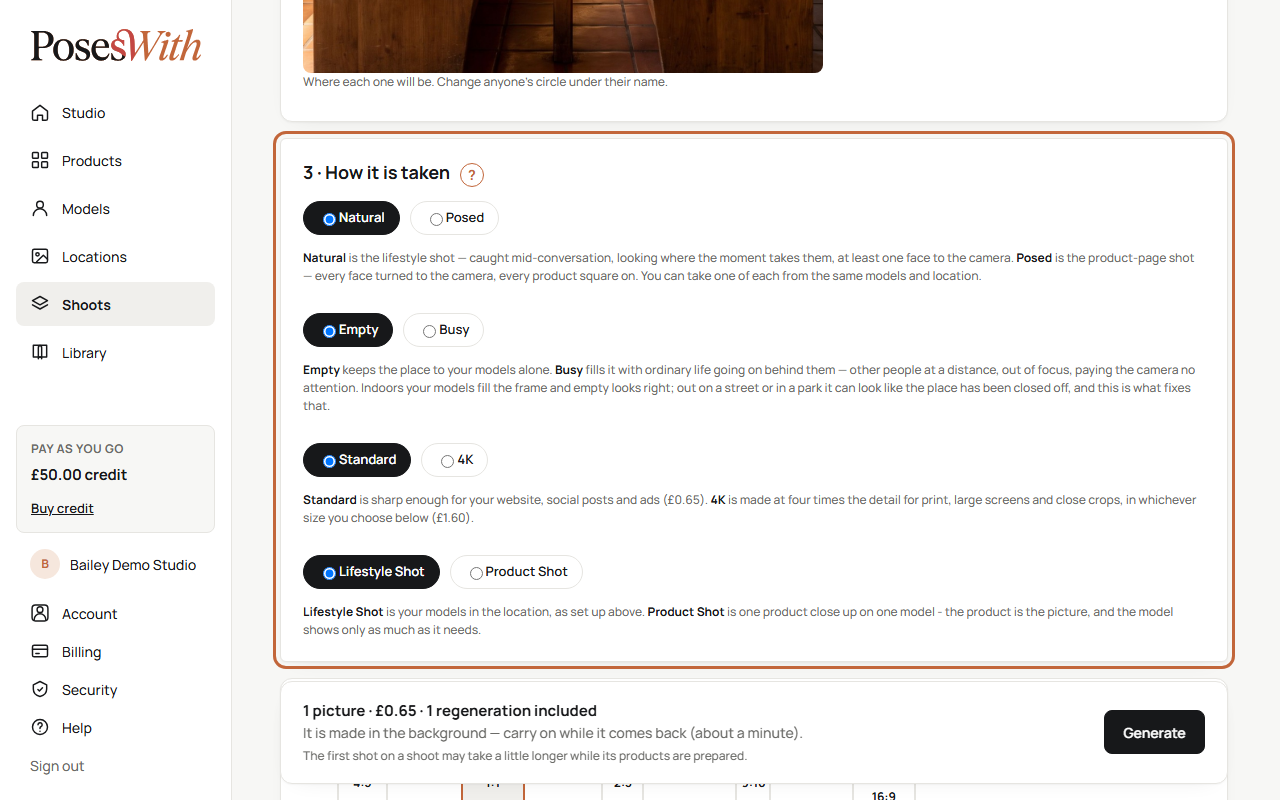
- Natural or Posed. Natural is the lifestyle shot - caught mid-conversation, with at least one face to the camera. Posed is the product-page shot - every face to the camera, every product square on.
- Empty or Busy. Empty keeps the place to your models alone. Busy adds ordinary life going on behind them - other people at a distance, out of focus. Busy helps on a street or in a park, where an empty place can look closed off.
- Standard or 4K. Standard is sharp enough for your website, social posts and ads. 4K is four times the detail, for print, large screens and close crops. 4K costs more - both prices are shown on the page.
- Lifestyle Shot or Product Shot - see below.
You can take one of each from the same models and location.
Product shots
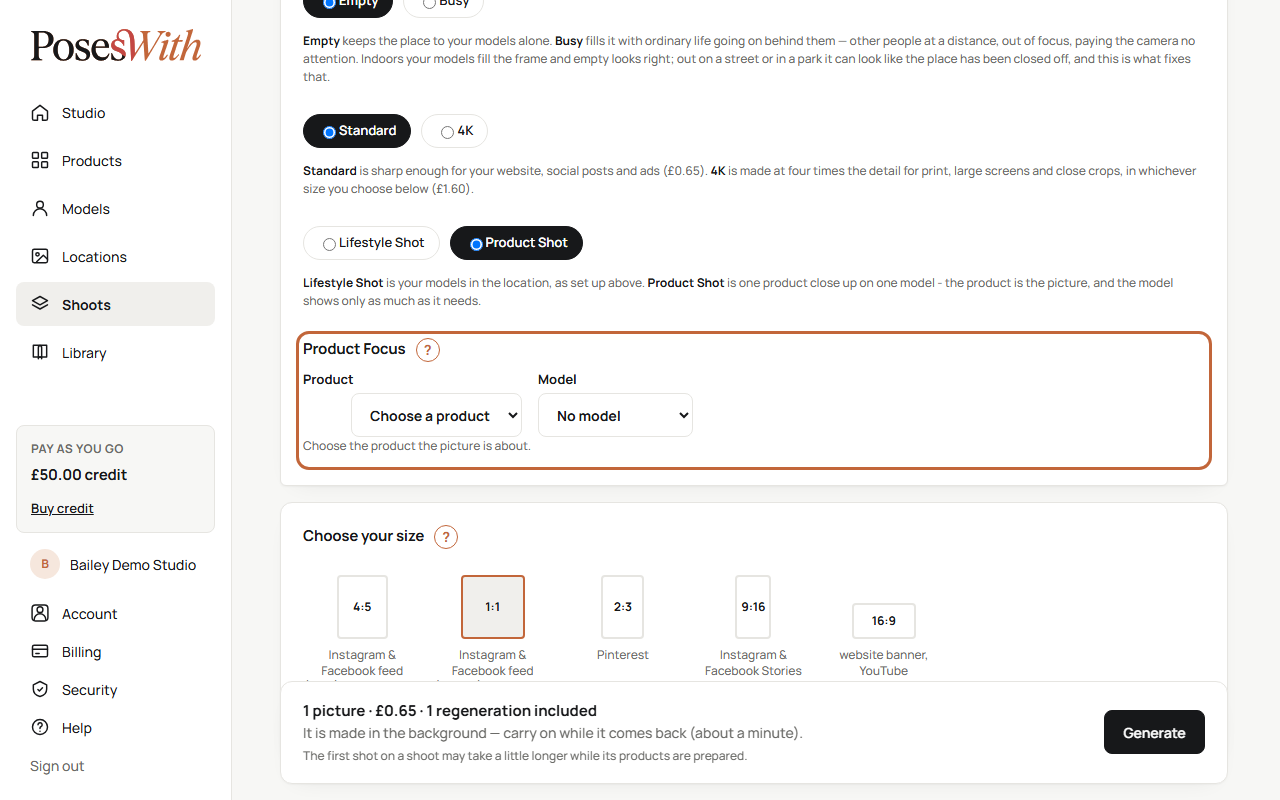
A Product Shot is one product close up. The product is the picture, and the model shows only as much as it needs.
In 3 · How it is taken, click Product Shot. A Product Focus box opens.
Under Product, choose the product the picture is about.
Under Model, choose who it's on. For a candle or a placed prop you can choose No model, for the product on its own in the location.
Things to know:
- Only models you've ticked the product for, further up, are offered. If the one you want isn't there, tick the product on them in 2 · Who is in the shot first.
- Every product shot is on a model except candles and placed props - No model is only offered for those.
- For clothing on a person, you can choose Front View or Back View. Back View shows the back of the garment, with the model facing away or looking back over their shoulder. If the garment only has a front photo, a plain back is made first, so that picture takes a little longer.
Choose your size
Each picture is made in one shape. Under Choose your size, click the one you want. The location picture above changes to show you how the shape will look.
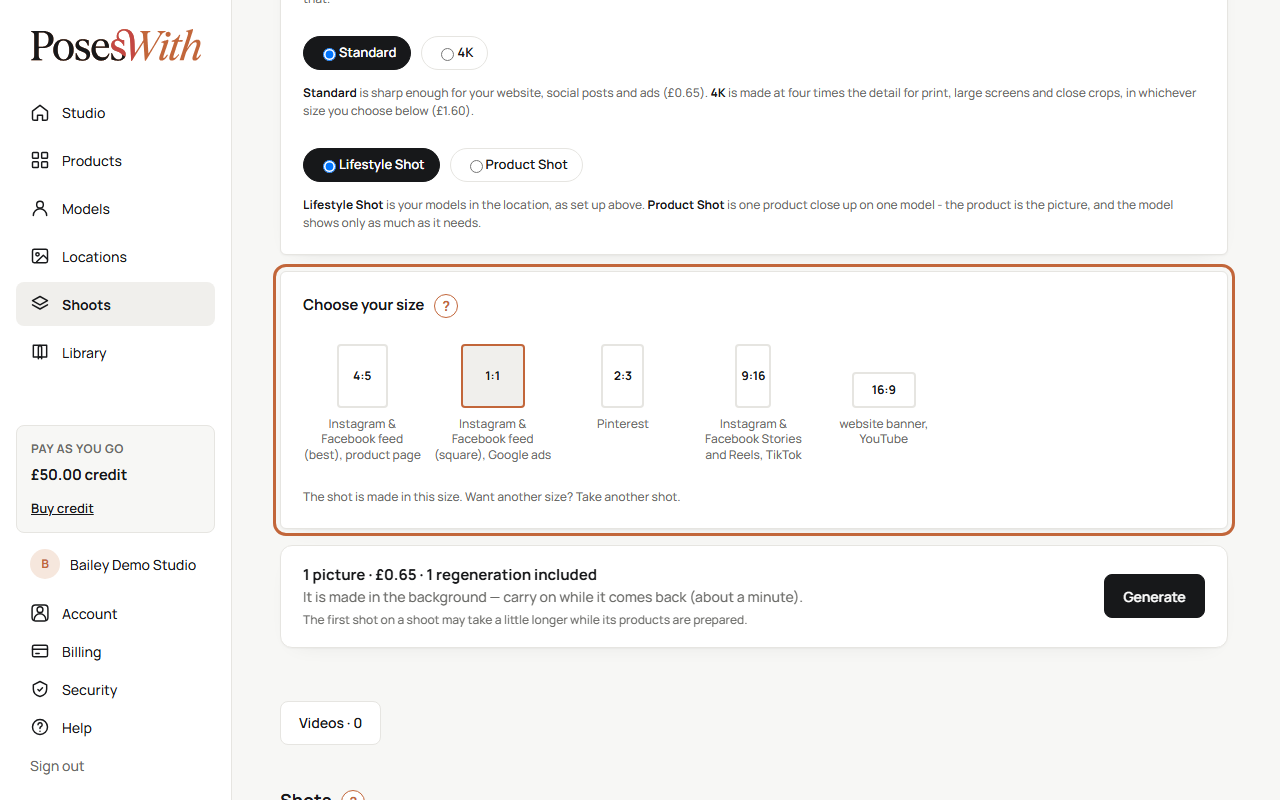
| Size | Best for |
|---|---|
| 4:5 | Instagram & Facebook feed (best), product page |
| 1:1 | Instagram & Facebook feed (square), Google ads |
| 2:3 | |
| 9:16 | Instagram & Facebook Stories and Reels, TikTok |
| 16:9 | website banner, YouTube |
A new shoot starts on 1:1. If a location only has one size, you won't see this box.
Tip: Want the same shot in another size? Take another shot in that size.
Take a shot
When the shot is set up the way you want:
Look at the bar at the bottom. It shows the price of the picture, and that a regeneration is included.
Click Generate.
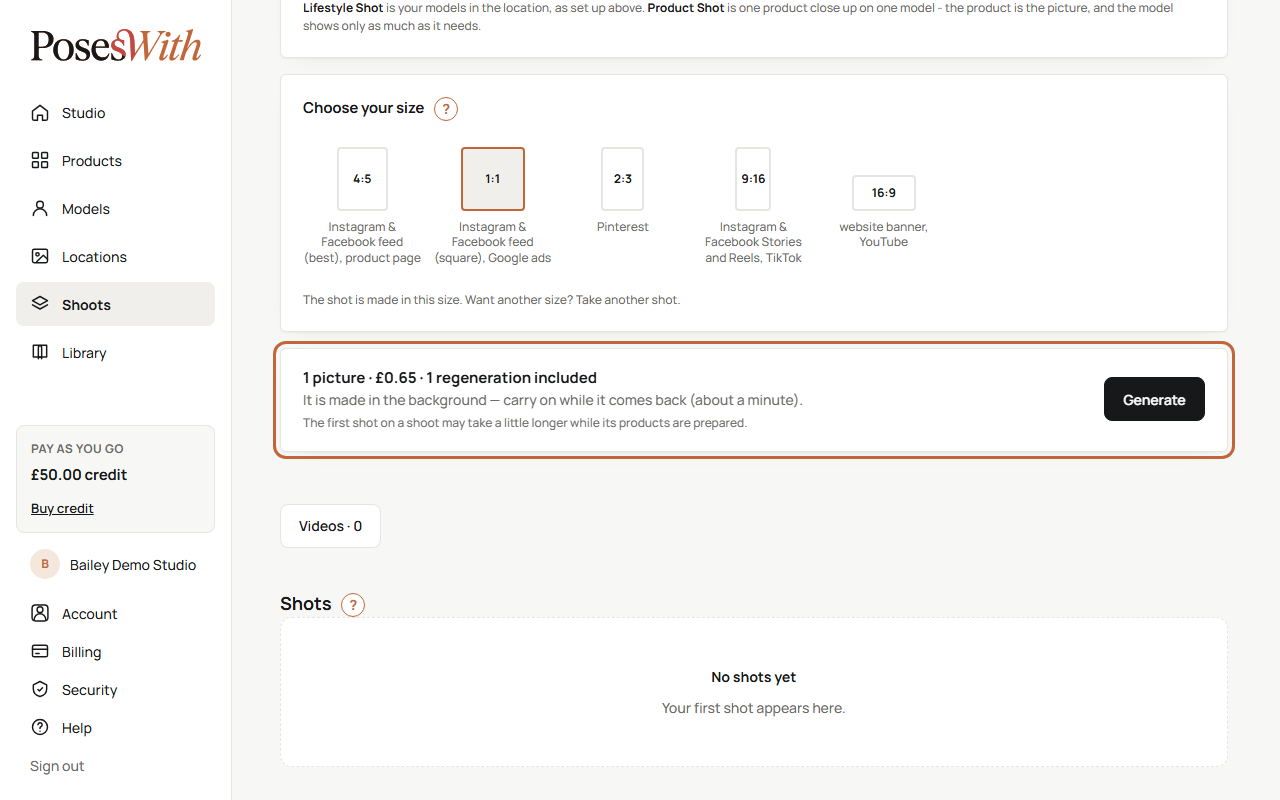
The page jumps down to your shots, and the new picture is made in the background - usually in about a minute. You can carry on setting up your next shot while it comes back. The page updates by itself when it's ready.
The first shot on a shoot may take a little longer while all its products are prepared. Later shots on the same shoot go at the normal pace.
The price of the picture comes off your credit when you click Generate. If a picture isn't made, or doesn't pass our quality check, you get the credit back. See Pictures.
Watch out: If you don't have enough credit, a box tells you how much the picture costs and what your balance is. Click Buy credit to top up, or Not now.
If the shot needs fixing
If something about the shot doesn't work, clicking Generate shows a box called Check the shot with what to change. Nothing is charged. The most common ones:
- Choose at least one model.
- Too many people or pets for one shot, or for this location - take one out.
- Two of them are in circle ... - give each person their own position.
- A model has more than one top, bottoms, jacket or footwear - pick one.
- A pet on P with a lead, or on R with a lead or harness - untick it, or choose Walking with or Sitting with.
- A pet walking with someone who isn't in the shot - choose who holds the lead.
- A product whose photo is still being checked - wait for the check to finish. See Your products.
Fix what it says and click Generate again.
"This location has changed - please reshoot" - very occasionally a location is updated after you've used it. Older shots then can't be regenerated as they were. Set the shot up again and click Generate to take a fresh one.
What next
Your picture is on its way. Find out how to check it, try again and download it: Pictures.