This guide shows you how to choose the place your pictures are set in, from the library of locations or one you make yourself. A location is a set, not a backdrop: every shot is a different spot in the same place, in the same light.
Choose a location
Your shoot happens in one location at a time, so every product you shoot matches.
Click Locations in the menu on the left. The page is called Choose the location.
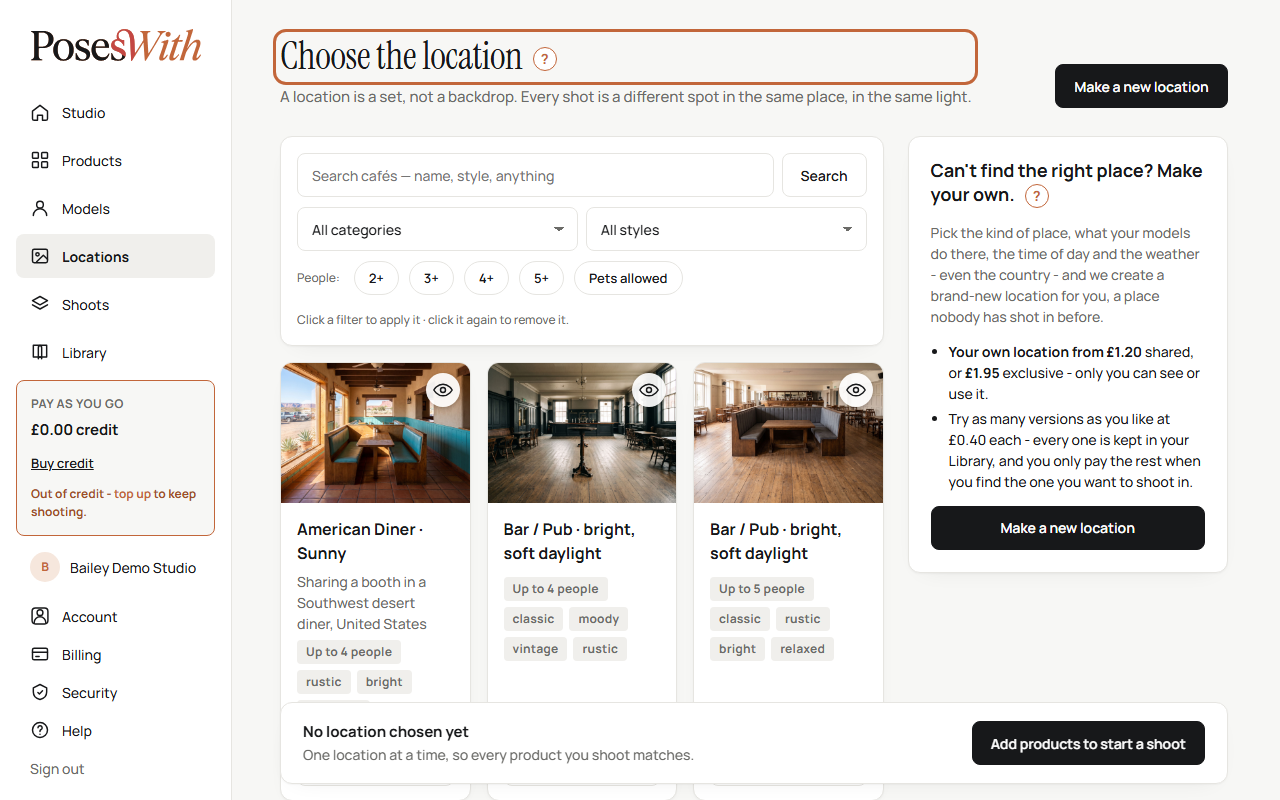
Find a place you like. Each tile shows a strip of the picture, its name, and tags such as Up to 4 people, its style, or Jogging for a path where the models jog rather than walk.
Click Select This Location on its tile. The tile is marked Selected, and the button changes to De-select This Location.
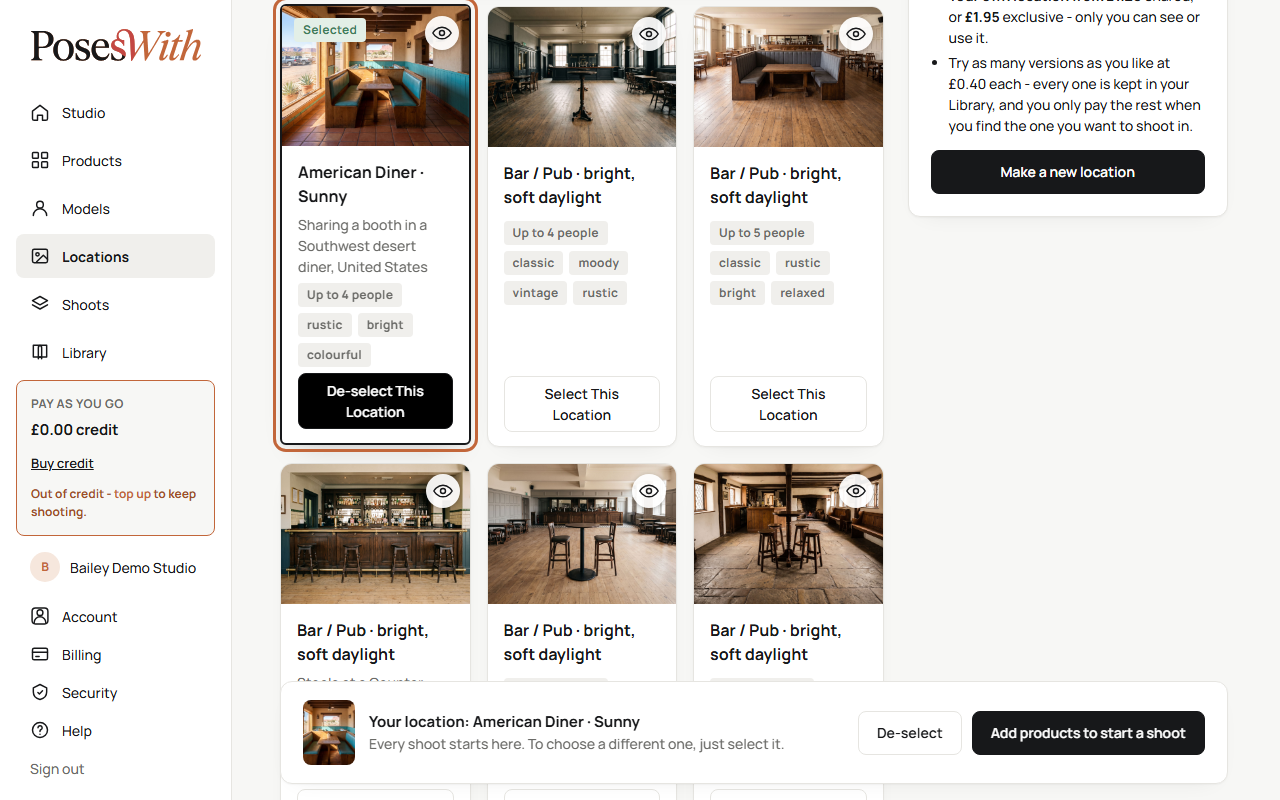
The bar at the bottom shows Your location: and its name, with a small picture. Click the button in the bar to carry on - for example Start a shoot once you have products, models and a location.
To choose a different place, just select it - it takes the place of the one you had. To choose none, click De-select in the bar at the bottom, or De-select This Location on its tile.
Your location clears once your shoot starts, so you choose afresh for the next one.
Watch out: Not every location has room for a pet. If you've picked a pet and select a location that doesn't allow pets, a message tells you. Choose another location, or take the pet off, before you take a shot.
See every size
The tile only shows a strip of each location. To see the whole place, click the eye button on its picture (See every size).
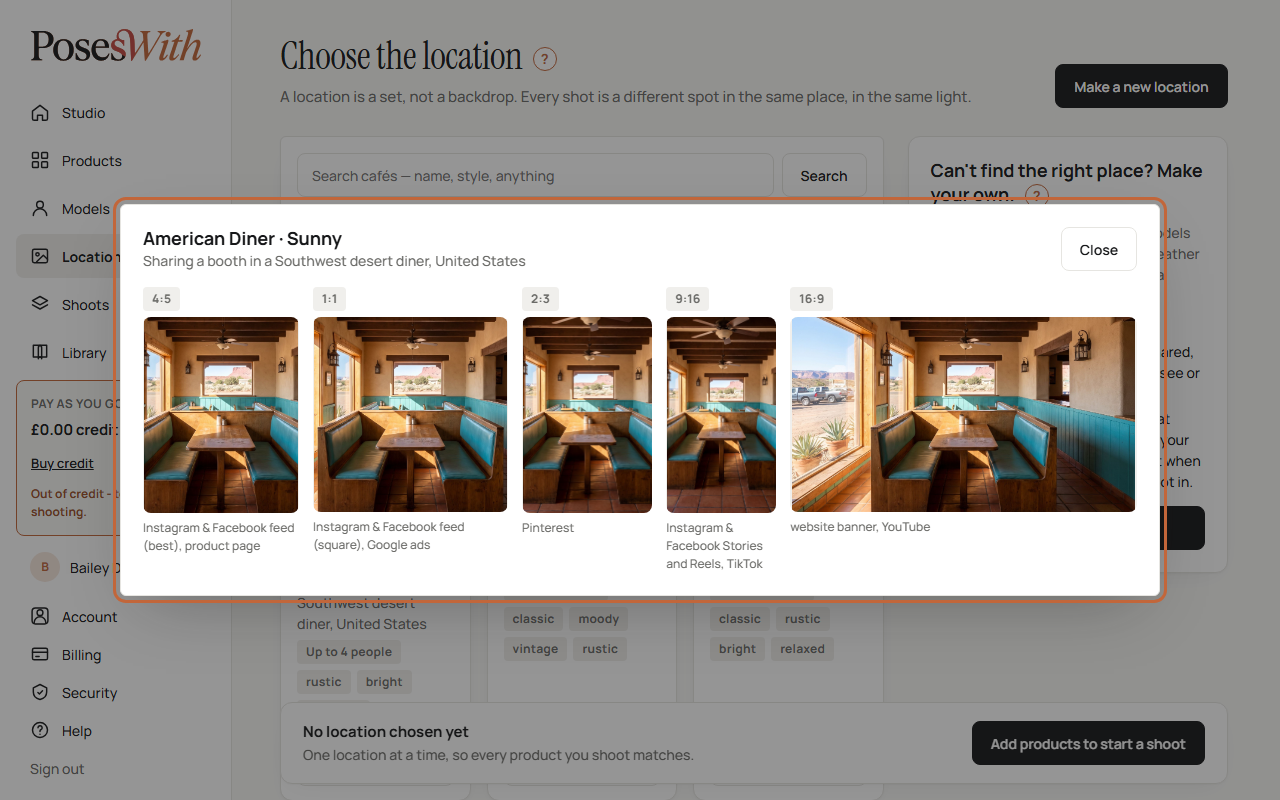
A window shows the location in each of the five sizes your pictures can be made in, and what each one is for:
- 4:5 - Instagram & Facebook feed (best), product page
- 1:1 - Instagram & Facebook feed (square), Google ads
- 2:3 - Pinterest
- 9:16 - Instagram & Facebook Stories and Reels, TikTok
- 16:9 - website banner, YouTube
Click a size to see it larger. Click Close to go back.
If you've already chosen a location, the window has a Compare with my location tick box. Tick it to see your chosen location's sizes underneath, size by size. Like this one better? Click Select this location in the window.
Find a location
The box at the top of the page helps you narrow the list.
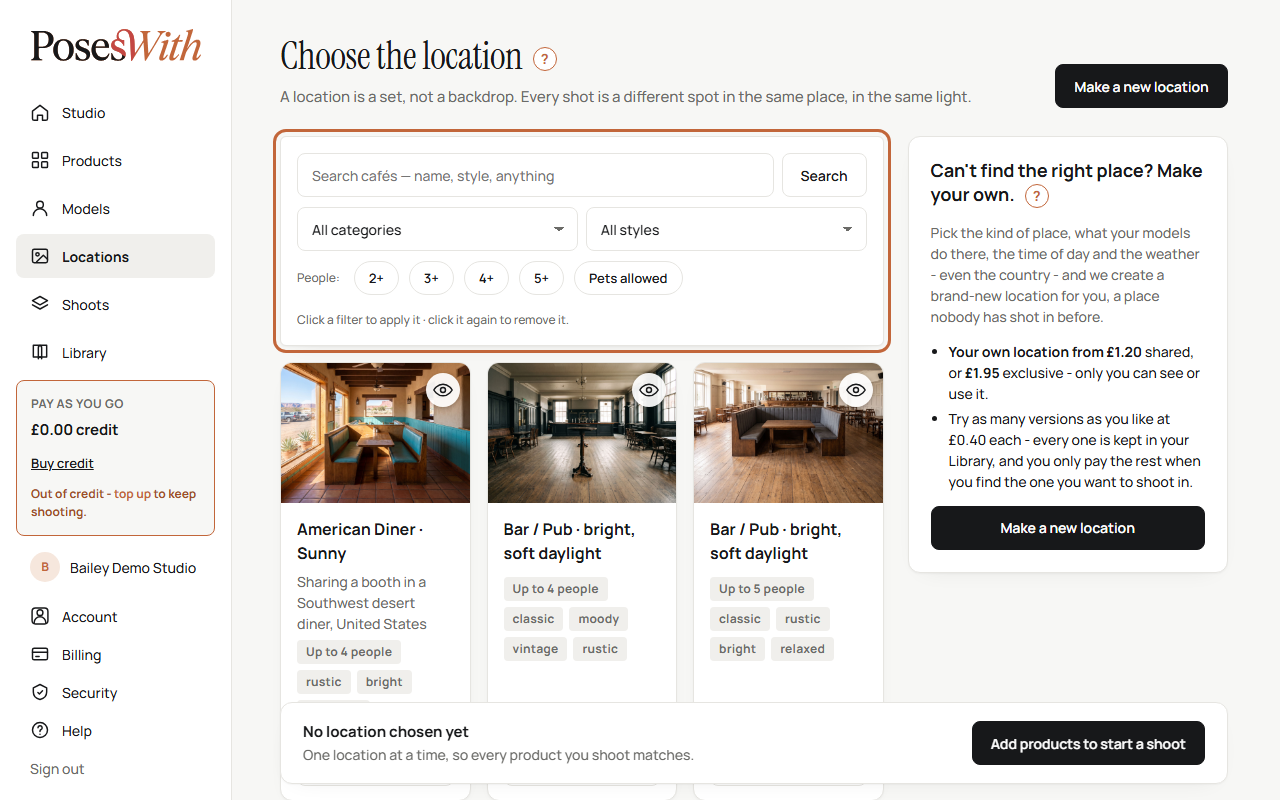
- Type anything in the search box - a name, a style, or a word like bench or path - and click Search.
- All categories - tick the kinds of place you want. The list updates when you close the box.
- All styles - tick the styles you want. The list updates when you close the box.
- People: - 2+, 3+ and so on shows only locations that take at least that many people.
- Pets allowed - shows only locations a pet can be in.
- Yours: - once you've made a location, Made by you shows yours, and Exclusive shows the ones only you can use.
Click a filter to apply it, and click it again to remove it. Clear shows them all again.
If nothing matches, the page says Nothing matches that - click Show them all. Locations show 24 to a page; use the page numbers under the tiles to move between pages.
Make your own location
Can't find the right place? Make your own. You pick the kind of place, what your models do there, the time of day and the weather - even the country - and we create a brand-new location nobody has shot in before.
On the Locations page, click Make a new location at the top right, or in the box on the right.
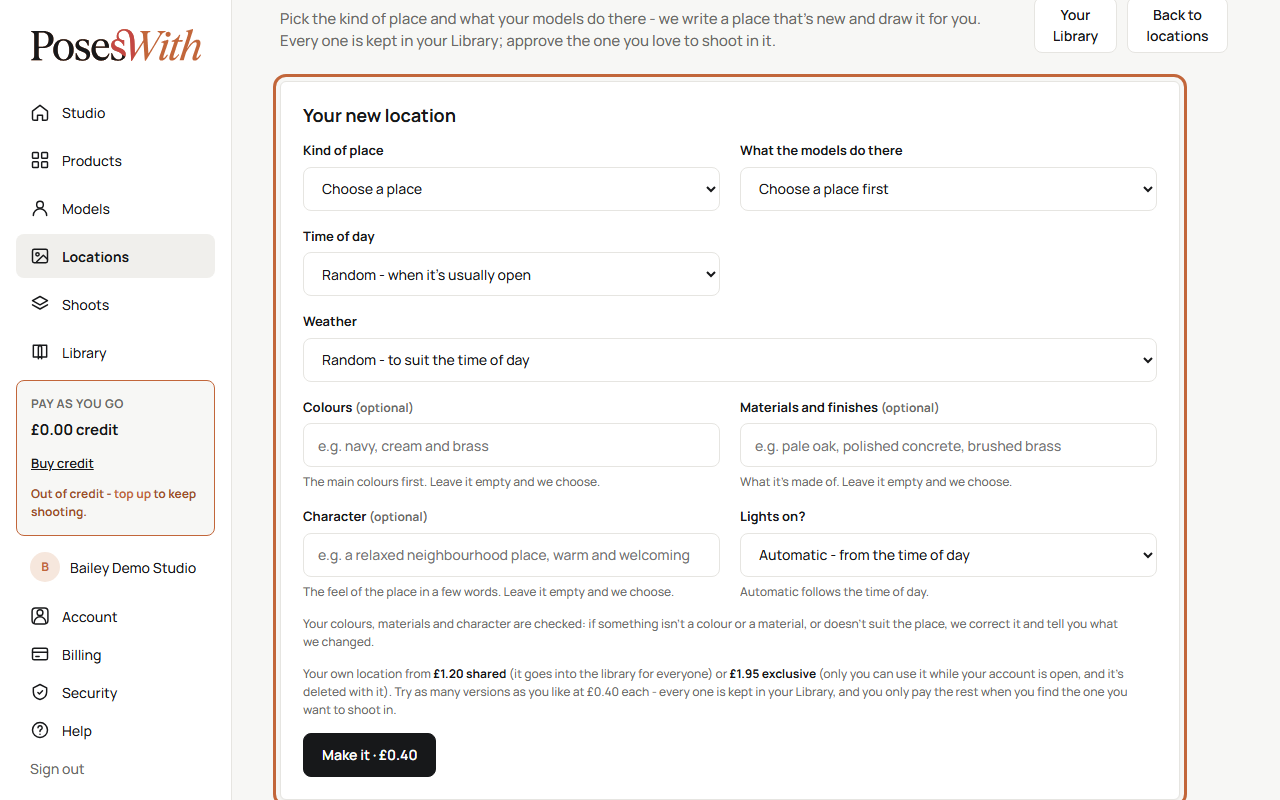
Choose the Kind of place.
Choose What the models do there. The list depends on the kind of place. Some choices, such as a table or a bench, ask a second question about how many it seats.
Choose the rest, or leave them as they are and we choose:
- Time of day - Random picks a time when the place is usually open.
- Country - where the place is: its buildings, style and feel. Random picks a different country every time. It only shows for places where the country makes a difference (never a home or the studio).
- Weather - for indoor places this may say Outside the window. Random picks weather to suit the time of day. It's hidden where the weather can't be seen.
- Colours - the main colours first, for example navy, cream and brass.
- Materials and finishes - what it's made of, for example pale oak, polished concrete, brushed brass.
- Character - the feel of the place in a few words.
- Lights on? - Automatic follows the time of day.
Click Make it (the button shows the price). The price of a draft comes off your credit. If you haven't chosen a kind of place and what the models do there, the page asks you to.
Your colours, materials and character are checked. If something isn't a colour or a material, or doesn't suit the place, we correct it - the draft shows a Note saying what we changed.
If you don't have enough credit, a message tells you the price - top up and try again. See Credit and billing.
Your location drafts
Every location you make is a draft first. Its page says Making your location… while it's written and drawn. It takes a minute or two, and the page updates by itself.
When it's ready, you see the new place in all five sizes, with buttons under it:
- Approve - shared or Approve - exclusive - you want to shoot in it. See Approve a location.
- Change settings - opens the form on this draft's settings, so you can make another version, the same or with anything changed. Each version is a new draft at the draft price, and this one stays as it is.
- Delete - removes the draft. It can't be brought back.
Every draft is kept in your Library: click Library in the menu, then Drafts, then Locations. Click See it full size on a draft there to open its page. Try as many versions as you like - you only pay the rest when you find the one you want to shoot in.
If a draft says That location is taking a little longer than expected, click Try again to make it again on the same settings, or Change settings. A draft that doesn't come back isn't charged.
Approve a location
To shoot in a location you made, approve it. Approving is charged at the price on the button, on top of the draft.
- On the draft, click Approve - shared or Approve - exclusive.
- Shared - it goes into the library for everyone.
- Exclusive - only you can see or use it, while your account is open. It's deleted with your account.
- A window asks you to confirm. Click Approve.
Watch out: You can't change shared to exclusive, or the other way round, after you approve.
Next, the location is finalised - we work out where your models stand and sit, so it's ready to shoot in. The draft says Finalising for shared use… or Finalising for exclusivity…, and the page updates by itself.
When it's ready, the draft says Ready to shoot in. Click Use it for my next shoot to make it your location and go to the Locations page.
If finishing says Finishing it is taking a little longer than expected, click Retry. Your location is already approved and paid for, so it costs nothing.
Find the locations you made
Your approved locations are on the Locations page with everyone else's. Click Made by you or Exclusive next to Yours: to show only yours. Your exclusive ones are marked Exclusive on their tile.
In your Library, each approved location has two buttons:
- On your Locations page - takes you to them.
- Use these settings - opens the Make a new location form on that location's settings, to make another version. The approved one stays as it is.
What next
Put your products, models and location together: Shoots.